
| Chapter 6 |
Chapter 6
Utilities and Miscellaneous Topics
This chapter tells you how to use some utility functions and miscellaneous features of the MAX. This chapter contains the following modules:
Viewing A Formula
Determining Which Version of the MAX Software You Are Using
Using the Built-In Calculator
Importing Data from Lotus 1-2-3 Spreadsheets
Exporting Data to Lotus 1-2-3 Spreadsheets
Changing System Parameters
Deleting Account(s) From the PC
Merging receipt accounts
Splitting receipt accounts
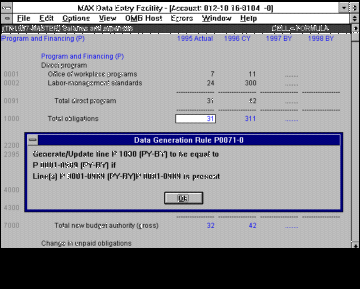
Viewing a Formula
Instructions
| Step | When you do this... | ...the system does this. |
| 1 | Position the cursor bar on a formula amount field, select the HELP-FORMULA option. | Displays the formula that was used to generate the amount. |
| 2 | When you have completed reading the information, select the OK button. | Redisplays the MAX Data Entry application. |
Exhibit
Determining Which Version of the MAX Software You Are Using
Instructions
| Step | When you do this... | ...the system does this. |
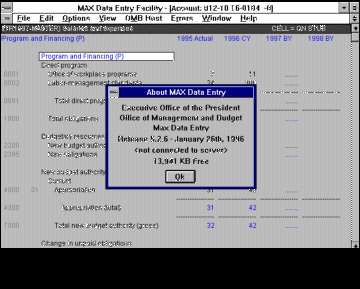
| Select the HELP-ABOUT option. | Displays the About MAX data entry box
which contains the following
information:
a. the present version of the software b. the date this version came online c. the amount of free memory available on your PC after loading the MAX Data Entry application. | |
| When you have completed reading the information, select the OK button. | Redisplays the MAX Data Entry application. |
Exhibit
This Page is Left Blank Intentionally
Using the Built-In Calculator
Instructions None
Notes
The Data Entry application permits you to access the Windows calculator installed on your PC. Different users may have different calculators; consequently, detailed instructions are not provided in this module. For more information, see the instructions that came with your calculator (e.g., its online help).
At this time, you can't copy a value from the calculator into an account amount. However, this feature is planned for a future release of the Data Entry application.
Importing Data From Lotus 1-2-3 Spreadsheets
Instructions
| Step | When you do this... | ...the system does this. |
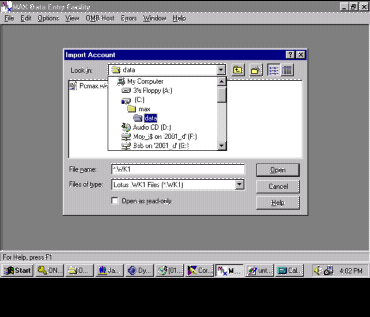
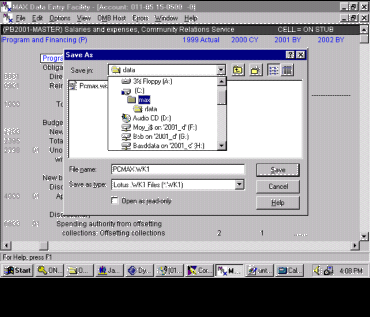
| Select the FILE-IMPORT LOTUS.WK1 option. | Displays the Save As box. | |
| Select the drive, directory, and filename from where you want to import. | ||
| Select the Open button. | Imports the account and opens the file. | |
| Select the FILE-SAVE options. | Saves the imported file, including any editorial changes you may have made. |
Notes
Restrictions to keep in mind regarding this system function:
All data must originate on the OMB Host. Put another way, you can't import a spreadsheet that you initially created on the PC.
You can't import data to the Data Entry application without previously having exported it from the Data Entry application. Put another way, any account you import must already exist on your PC.
You can only change amount values in Lotus; you can't make changes that would result in the addition or deletion of lines when the data are imported into the account. For example, you can't insert a line in Lotus 1-2-3 and then import the change into an account.
Changes made in Lotus are applied only when the user saves the account. That's why using the FILE-SAVE option is included in the instructions subsection above.
Exhibit
Exporting Data to Lotus 1-2-3 Spreadsheets
Instructions
| Step | When you do this... | ...the system does this. |
| After making changes to an account on the MAX Data Entry application (and with that account still open), select the FILE-EXPORT LOTUS.WK1. | Displays the Save As box. | |
| Select the path (drive, directory, and filename) to where you want the file exported. | ||
| Select the Save button. | Exports (i.e., writes) the account to the path/filename you specified. |
Notes
When you export an account, you must provide a name for the file into which the system will place its data. The default filename is PCMAX.xxx (where xxx is WK1 for a Lotus file). You may change the default filename to one of your own. The file can be on the hard drive (e.g., C:\LOTUS\FEBDATA) or a floppy (e.g., A:\FEBDATA). If the filename already exists, the system gives you the option to overwrite the existing file. Regardless of what you name the file, its data will be in .WK1 format.
Restrictions to keep in mind regarding this system function:
All data must originate on the OMB Host. Put another way, you can't export a spreadsheet that you initially created on the PC.
You can only change amount values in Lotus; you can't make changes that would result in the addition or deletion of lines when the data are imported into the account. For example, you can't insert a line in Lotus 1-2-3 and then export the change into an account.
Exhibit

Changing System Parameters
Instructions
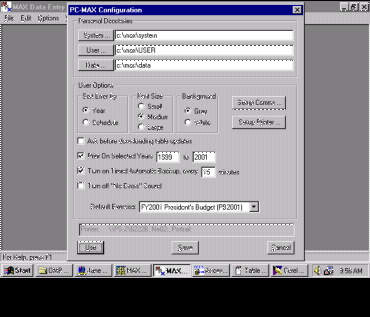
| Step | When you do this... | ...the system does this. |
|
|
Select the OPTIONS-CONFIGURATION. | Displays PC MAX Configuration box which lists selected options. |
|
|
PERSONAL DIRECTORIES
Enter Information on: |
Default
C:\MAXA11\SYSTEM |
|
|
USER OPTIONS
Enter Information on: |
|
|
|
SETUP Printer | Displays selected printer |
|
|
a. To save your new parameters for this
and future interactive sessions, select
the Save button.
b. To use your new parameters for the remainder of this session, but not write your changes to disk, select the Use button. |
Writes your new system parameter changes
to disk.
|
Exhibit
Deleting Account(s) From the PC
Instructions
| Step | When you do this... | ...the system does this. |
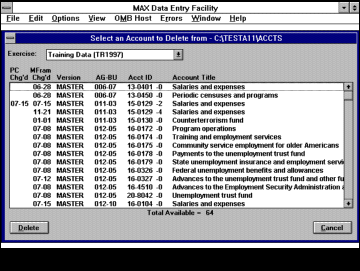
| Select the FILE-DELETE options. | Displays the Select an Account to Delete box which lists the accounts available on your PC. | |
| Use the UP/DOWN ARROW keys to view all the accounts names in the list. | Scrolls through the listing to display all the accounts. | |
| Select the account(s) you want to delete. | Highlights the accounts. | |
| Click on the delete button. | Displays a Delete Confirmation Box. | |
| Select yes, yes to all, no, or cancel. | Deletes the user-specified account. |
Exhibit
Merging Receipt Accounts
Instructions
| Step | When you do this... | ...the system does this. |
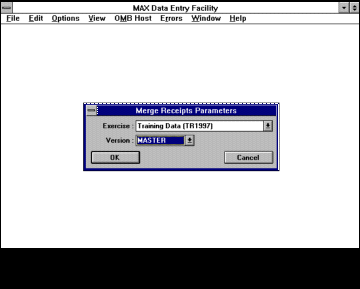
| After you have download to your PC all the receipts accounts you would like to merge, select OPTION-MERGE RECEIPT ACCOUNTS option. | Displays a Merge Receipts Parameter box. | |
| Select the exercise and version. | ||
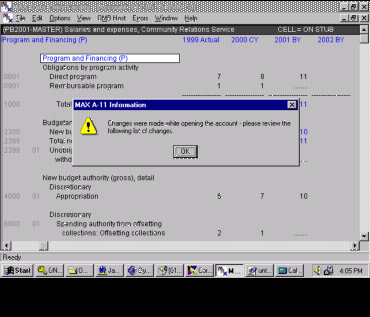
| Select the OK button. | Displays a MAX A-11 Information box with the message: "Merged # receipt accounts." | |
| Select the OK button. |
Notes:
Once you have merged all your receipt accounts, you can either edit the merged account using the MAX A-11 application or export the merged account into Lotus.
Splitting Receipt Accounts
Instructions
| Step | When you do this... | ...the system does this. |
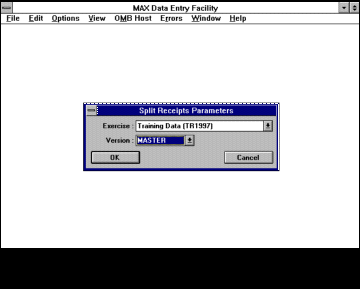
| Select OPTIONS-SPLIT RECEIPT ACCOUNTS option | Displays a Split Receipts Parameters box. | |
| Select the exercise and version. | ||
| Select the OK button. | Display a MAX A-11 User Query Box with the message: "This will replace the data in all PB1997-MASTER receipt accounts - Do you wish to continue?" | |
| Select yes or no. | Display a MAX A-11 Information box with the message: "Split # receipt accounts." |
Exhibit
The Budget | Legislative Information | Management Reform/GPRA
Grants Management
Financial Management | Procurement Policy | Information & Regulatory Policy
Contact the White House Web Master
Privacy Statement